 I've never had much luck growing peas… I usually console myself with the tendrils and buy English peas at the market. For Spring's last hurrah, I sauteed freshly shelled peas with morels, asparagus and tarragon (from the garden). I tossed it all with fresh pasta; a little butter, lemon juice and freshly grated parmesan rounded out the dish.
CSA Cookbooks (Recipe: Pesto Pasta with Seared Scallops)
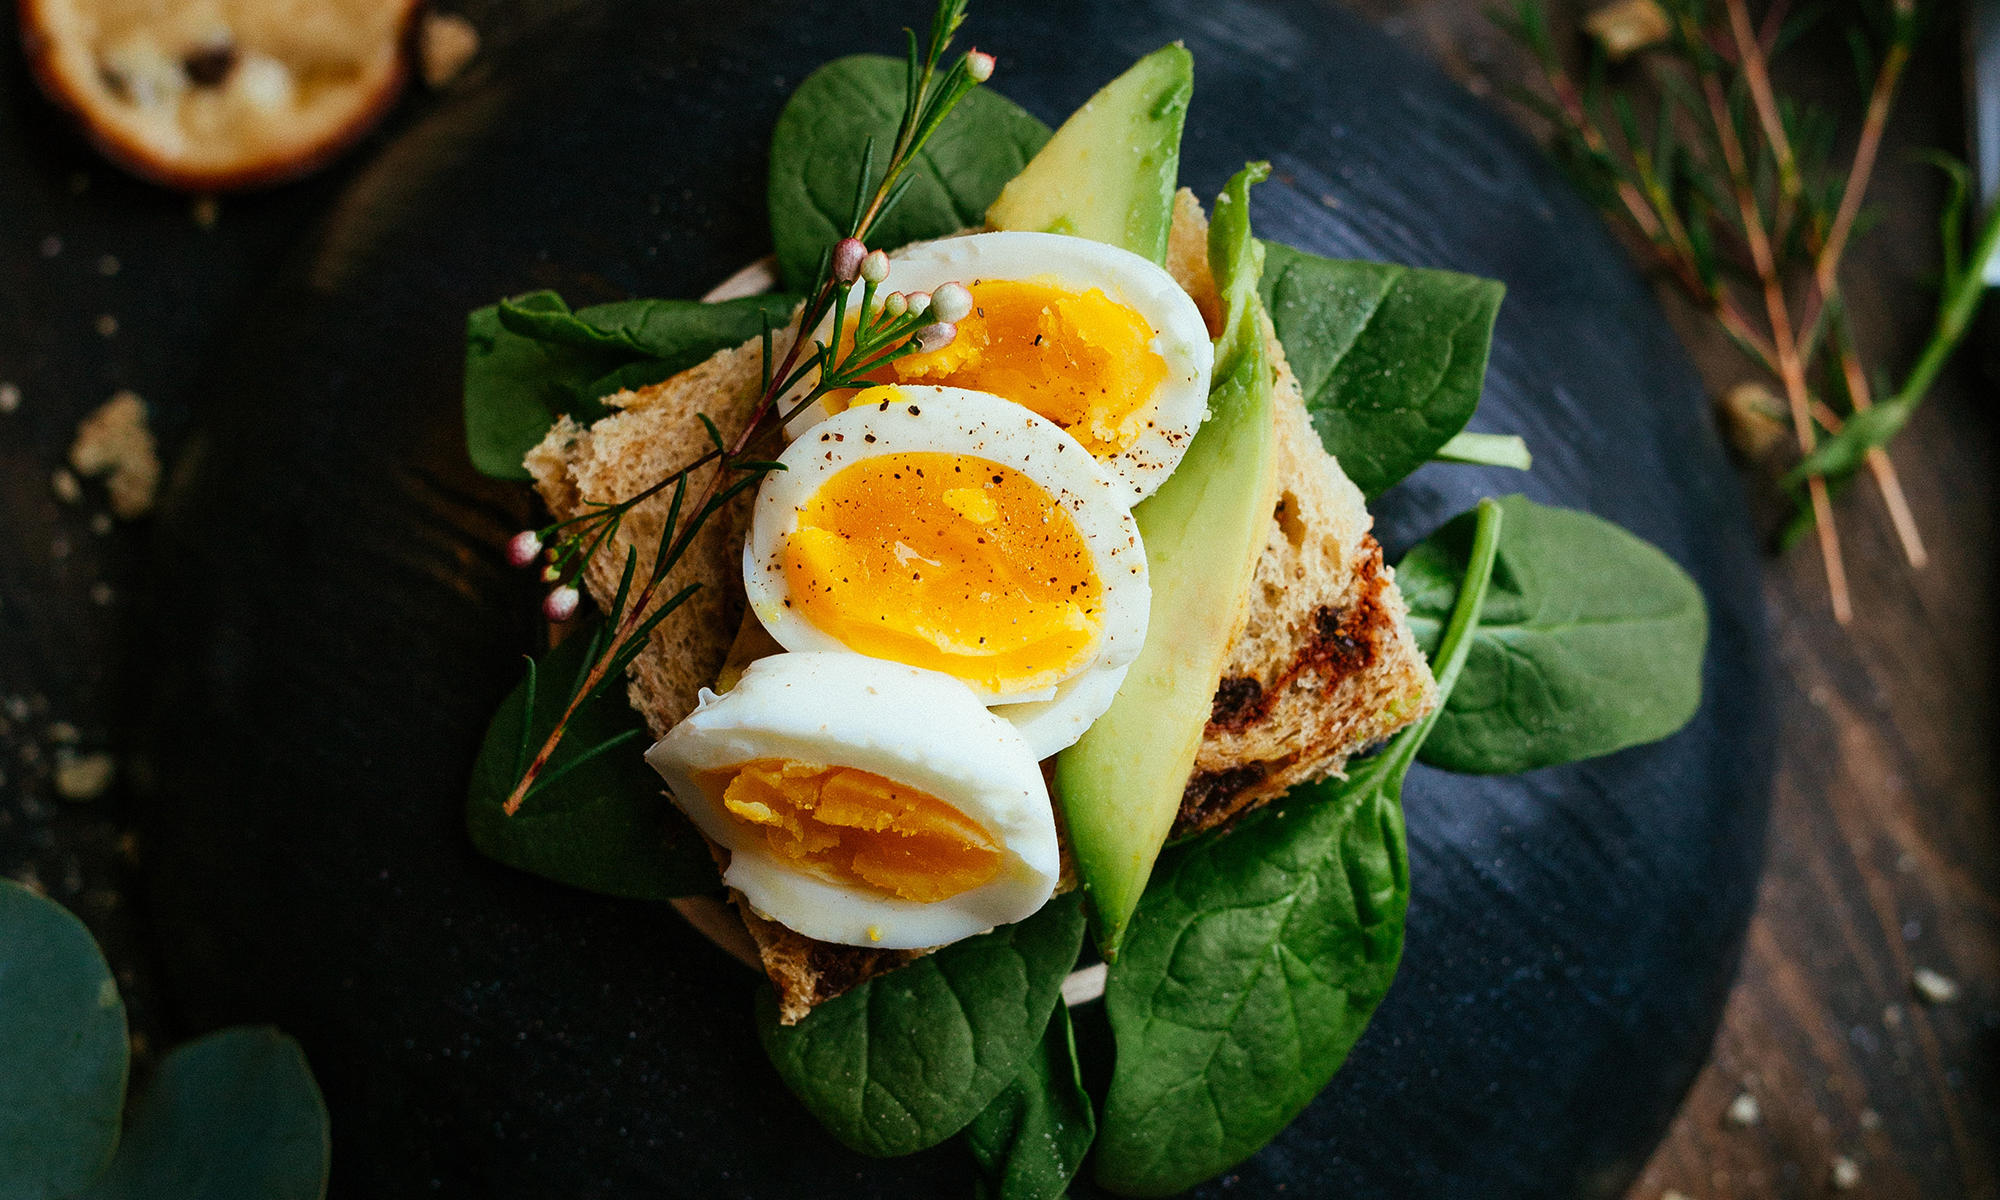
![]() Many CSAs are starting up this week with their first deliveries. CSA stands for Community Supported Agriculture. It’s a concept that has increased in popularity over the past few years as more consumers become concerned about their food sources.
Many CSAs are starting up this week with their first deliveries. CSA stands for Community Supported Agriculture. It’s a concept that has increased in popularity over the past few years as more consumers become concerned about their food sources.
So what is a CSA? Farmers sell subscriptions or shares of their farms crop to the public. In exchange, the consumer gets a weekly box (bag, basket) of farm-fresh produce throughout the growing season. By purchasing a share, the farmer gets paid in front of the growing season when cash-flow is tight. He also knows that he has a committed marketplace to bring his produce. The consumer gets the freshest produce possible and supports the local economy and farmers. The added benefit for the consumer is getting in touch with where their food comes from. Typical CSA subscriptions run for 15 weeks throughout the summer and cost around $400 for a share. The produce in the box varies from week to week, depending on what the farm is harvesting. In New England, early weeks’ boxes include leafy greens, peas, strawberries and radishes. Later in the summer come zucchini, tomatoes, cucumbers and corn. Subscribers can expect 6-8 different vegetables each week. Some farms offer winter subscriptions, too. Here in New England, we have meat CSAs and fish CSAs too.
For all the great benefits of CSAs, there’s one inherent drawback that most advocates gloss over…the consumer often gets vegetables they have no idea how to cook (kohlrabi, anyone?) or too much of something they know how to cook only one or two ways (Swiss Chard). The farmer is too busy harvesting (and truthfully, doesn’t particularly like the regular communications with the subscribers) to share new recipes or cooking tips. To alleviate this challenge, my dear friend Brett and I started a venture to create custom cookbooks for small farms. The farmer sends us a list of the crops he’s growing for the season and in return gets a cookbook full of recipes written especially for his crops, as well as storage and cooking tips. We recommend that the farmer build the cost of the cookbook into the price of the CSA and give to the subscribers as part of the package.
Throughout the season, I will be featuring recipes from the book we wrote for Even’ Star Organic Farm. If you have challenges coming up with recipes for your CSA subscription, email me at julia [at] CSAcookbooks [dot] com, and I will post recipes just for you.
And if you belong to a CSA, tell your farmer about CSA Cookbooks. For more information about CSAs or to find a CSA in your area, visit LocalHarvest.
Basil Pesto
First of the season basil is lighter and softer in flavor than the later cuttings. Pesto is a great way to use up vast quantities of basil, and freezes superbly. Tossed with pasta and served with seared scallops, it’s a great summer dinner.
¼ c olive oil
8 cloves garlic, coarsely chopped
½ t salt
¼ t black pepper
¼ c white wine
¼ c almonds or pine nuts, toasted and then cooled
about 4 c basil leaves (Genoa type)
at least ½ c more olive oil or vegetable oil
¼ c grated Romano cheese
more salt and pepper to taste
Sauté the garlic in the ¼ c olive oil until soft but not very brown. Immediately add the next three ingredients and simmer until the wine volume has reduced by one half. Let cool.
Process all this in a Cuisinart until the garlic is fully pureed. Add the nuts and process until nearly smooth. Add the basil and PLENTY OF OLIVE OR VEG. OIL. Process further, until the basil is just barely smooth (no leaf pieces bigger than 1/8”), always adding more oil if the surface of the basil appears exposed to air. Add the cheese and process 15 seconds more. Taste for salt and pepper.
Place in a Tupperware or a glass jar and immediately be sure that there is at least ¼” oil floating over the basil.
Keeps 6 weeks in the ‘fridge or 2 years in a freezer.
Cooking with Katie

Like most women, I vacillate between wanting to lose 20 pounds and being content with my weight. When I "adopted" Katie from Eat this, I excitedly looked through her recipes for new ideas to cook healthy. She cooks with a lot of whole grains, many that I know of, but don't typically cook. Maybe I can finally make realistic modifications to my diet and lose some weight.
Last night, I brought dinner to a friend. She prefers the style of Katie's cooking – lots of whole grains and mostly vegetarian — so it seemed the perfect opportunity to make one of her recipes. Did I choose the healthy and beautiful looking Lentil Soup with Spinach? Or the Pinto bean, avocado, tomato and wheatberry salad? No. Of course, I opted for the Roasted Veggie and Cheese Pasta. The least healthy of all her delicious recipes.
And let me tell you, it was indeed delicious! I'll confess, I made a few adaptations… wanting to use what was in the fridge… I used fresh dug parsnips and carrots instead of the recommended peppers, zucchini and eggplant. And I added ramps instead of garlic and onions.
So, if you're craving virtuous and delicious recipes, check out Katie's blog. If you're looking for healthy twists on your favorite recipes, check out Katie's blog. You won't be disappointed.
And by the way, Katie is giving away jars of Tupelo Honey. Just leave a comment on her blog between now and Friday, May 22 to be entered to win. As if you need another reason to read her blog.
Food Styling (Recipe: Fettucine with Spring Mushrooms
 Growing up, I cooked mostly from the Time-Life Cookbooks. I loved the pictures in The Good Cook series that guided me through the techniques of each recipe. When I tired of those, my mom bought me the Healthy Home Cooking series and then the Great Meals in Minutes. To me, these books were far more interesting than Judy Blume or Nancy Drew. I would browse through the pictures, and ask my mom to buy the ingredients of the most enticing photos.
On the cover of Fresh Ways with Fish & Shellfish was the most enticing photo of Shrimp and Asparagus Wrapped in Sole. I read the recipe once, twice and then after the third time, I finally queried my mom – how was I going to wrap the fish around the shrimp and asparagus to look like the photo? She couldn’t figure it out either, and so she got on the phone to call the editor. I guess at this point in the story, I should mention that she worked for Time-Life Books so it wasn’t completely over the top that she should pick up the phone.
It was at that moment I discovered what food styling is all about: making food look enticing and succulent for the camera. Realistic and edible are not required.
Every once in a while, I will style food for local photographer Ellen Callaway. Together we created a portfolio of food shots. Unlike the recipes I create for my blog, we pick dishes that inherently will work for the camera. Because of that early childhood trauma, I refuse to stage food that is not created according to the recipe accompanying the shot.
For a recent photo shot, I wanted to create a pasta dish with chanterelle mushrooms, but only hedgehogs were available.
Fettuccine with Wild Spring Mushrooms and Parmesan
½ pound fettuccine
3 scallions, cut lengthwise into 4 pieces each
2 tablespoons extra virgin olive oil
3 tablespoons butter
½ pound chanterelle or hedgehog mushrooms, brushed clean and cut into quarters
3 garlic cloves, sliced
1 shallot, peeled and finely chopped
1 tablespoon fresh thyme, chopped
¼ cup dry sherry
Salt, pepper and lemon juice to taste
Freshly grated parmesan
1. Cook pasta according to package directions. One minute before it’s done, add scallions to the water. Drain pasta and scallion together and toss with olive oil.
2. Meanwhile, heat a large skillet over medium high flame. Add butter. When it’s melted, sprinkle the mushrooms in one layer in the pan. Top with a sprinkling of garlic, shallots, thyme, salt and pepper. Let cook for 3 minutes without stirring. Stir and then let cook for another 3 minutes.
3. Deglaze the mushroom pan with sherry. When mostly reduced, adjust seasoning with salt, pepper and lemon juice.
4. Toss pasta with mushrooms. Serve with freshly grated parmesan cheese.
Some other photos, Ellen took of my food:
Braised Artichokes with Creamy Risotto


Presto Pasta Nights, Part 2 & 3
I came home from school on Monday evening absolutely starving… and knowing that I had already devoured the chicken ragu with chick pea pasta, I scrounged around the fridge for something to eat. In the crisper drawer I discovered Tuscan kale, corn and pork sausage: I had gone to the market on Saturday knowing I wanted to make something for Presto Pasta Nights, but not really sure what, so I bought the makings for several different dishes.
Not wanting to waste food, I made two different pasta dishes that I can now eat throughout the week. Supplementing with tomatoes and basil from the garden, I made:
Pasta with Tomatoes, Corn and Basil tossed with Fresh Mozzarella
Pasta with Wilted Kale, Tomatoes, Spicy Sausage and White Beans
The only addition to the recipes other than the ingredients listed were a little garlic, shallots, salt and pepper.
Thanks again, to Psychgrad for hosting the party!
Chicken Ragu and Chick Pea Pasta
I’m not sure I fully understand, but I always love a party! Psychgrad over at Equal Opportunity Kitchen is hosting “Presto Pasta Night.” Presto Pasta Nights is a blog that features all forms of the beloved noodle – fresh, dried, wheat, rice, if it’s a pasta…. Ruth writes about it. And every week there’s a round-up of what other people are making. It’s a great inspiration if you’re looking for new recipes for pasta.
Sage continues to proliferate in my garden. I have so much that I’m on the verge of knocking on restaurant kitchen doors to see if I can sell them some. I donated one gallon of leaves to the Locavore Banquet (that’s part of the Energy Smackdown) and still the plants look as lush as ever. I could make a pasta with fried sage and parmesan, but that just doesn’t seem festive enough for a party… especially since I’ve seen the way Psychgrad throws a party. Instead, I opt for Chicken Ragu with Chick-Pea Papardelle. The chicken is seasoned with sage, tomatoes and cinnamon. The pasta dough is made with a blend of all-purpose flour and chickpea flour.
Chicken Ragu with Chick-Pea Papardelle
¼ cup olive oil
¾ cup diced onion
¾ cup diced celery
¼ pound bacon, diced
¼ cup flour
1 tsp. salt
½ tsp. black pepper
4 – 5 chicken thighs
1 cup dry white wine
2 cup chicken stock
1 cup water
2 tomatoes, diced
1 tbs. fresh sage, chopped
½ tsp. cinnamon
¼ pound grated Pecorino romano or parmigiano reggiano.
1 tbs. fresh chopped parsley
1. Season chicken with salt and pepper, dust with flour.
2. Heat a large skillet, add oil, and then the vegetable. Cook for a few minutes, or until soft. Add the bacon and continue cooking until bacon renders its fat.
3. Remove the vegetable, and set aside. Turn the heat to high and add the chicken. Brown on both sides.
4. Deglaze the pan with white wine. Add the vegetables back to the pan, along with the remaining ingredients EXCEPT the Pecorino and parsley. Cook covered for about 20 minutes, or until the meat is tender.
5. Shred the meat and continue cooking, uncovered until the sauce is reduced and thick
6. Serve with Pasta. Sprinkle cheese and parsley on top.
Chick Pea Pasta Dough
1 ½ cups unbleached all-purpose flour, plus ¼ cup for dusting
½ cup chick pea flour
2 -3 large eggs as needed
1 tbs. olive oil
1 tsp. salt
1. Sift flours onto a clean counter. Make a well in the flour, and add the eggs, olive oil and the salt.
2. Beat the eggs with a fork, gradually bringing in the flour from the sides of the well, until the paste has thickened enough so the liquid will not run onto the counter. Switch from a fork to a pastry cutter. Bring all the flour into the already wet part and cut through the dough several times until it is evenly moistened. Start kneading with your hands until the dough forms a ball and looks homogenized, about 8 minutes.
3. If the dough becomes stiff, and refuses to bend, rub in a little of the remaining egg. If the dough becomes too moist, add a bit of the flour.
Work the dough by machine:
4. Divide the dough into 3 balls, and let rest under a damp towel for 20 minutes. (This is a good time to make the rest of the recipe). Start working the dough through the pasta machine starting with the widest setting. After running it through the machine, fold it into thirds, and run it through again. When the dough is smooth, run the dough through the machine through successively smaller settings. The dough will stretch out, and be rolled very thin.
5. When you have achieved thin sheets, you can let the dough rest for a few minutes before filling or cutting.
6. Cook in a pot of salted, boiling water for 3 minutes. Drain and toss with sauce.
Thanks to David for taking pictures!
Raising Clams
Have you ever seen a clam mate? Me neither. But when I was in Wellfleet this week, a town in Cape Cod renowned for its clams, I spotted a poster that explained the process. The male clams spit out sperm, and the female spew eggs. The eggs fertilize in the sway of the current and plant themselves in the sand. In about 3 years they grow to about 2 inches in diameter. In the warm, briny waters of Wellfleet Harbor, they develop a sweet, salty flavor.
The clam “farmers” take a more systematic approach to raising clams. They buy clam “seeds” by the millions. The seeds are smaller than a pinky nail. So they don’t get lost at sea, they are caged in a mesh box.
At low tide, the boxes are laid out on the sandy, harbor floor. At high tide, they are submerged. Same view of Pat's Clam bed — on the left at high tide, or the right at low tide.
After a year, they are large enough to be transferred to the larger sand beds.
At low tide, the shores of Wellfleet harbor are dotted with trucks and clam farmers. In addition to raking up a daily yield to sell to local restaurants and fish markets, they are managing their beds. When beds are emptied of mature clams, they are raked clean of stray shells. Young clams are ready to be set. The rows are strategically lined so that they can drive their trucks between them and efficiently transfer the daily catch.
Pat Woodbury’s beds are on the east side of the harbor. Though most Wellfleet natives aren’t familiar with him, he’s famous in Boston for supplying the James Beard Award Winning restaurants: Summer Shack, Rialto and East Coast Grill, as well as many others.
On the north side is Michael (whose last name escapes me). He supplies his mom’s restaurant, The Bookstore and Restaurant, in the center of town. At lunch, you can order his clams just hours after they were plucked from the waters.
Michael also let me dig some clams to cook at home. I prepared the classic…
Italian Pasta with Clams, White Wine and Garlic
4 tbs. extra virgin olive oil
3 clove garlic, chopped
1/2 bunch parsley, chopped
2 dozen Wellfleet clams, washed.
2/3 cup dry white wine
1/4 tsp. dried hot chili flakes (optional)
2 tbs. brandy
1 lb. linguine or fusilli
1 tbs. grated parmesan
1. Bring a large pot of water to a boil. Season generously with salt. Cook pasta according to package instructions.
2. In a separate skillet, heat 3 tbs. olive oil with garlic and chili flakes, cook for about 2 mintues or until garlic starts to lightly brown. Add the clams, and toss to coat in garlic. Cook, covered for 2 minutes.
3. Add wine and brandy to the clams, and cook, uncovered until the clams begin to open. Add half the parsley.
4. Toss pasta with clams and add the remaining olive oil and cheese. Garnish with remaining parsley.
Sage Gone Wild
Up until this year, my sage plants have hobbled through the seasons. Each of the 4 plants would grow anemically, with just enough leaves each week to add sparkle to maybe one dish. Every once in a while, I’d be cooking an especially sage-y meal and I would decapitate a plant. If patience prevailed and the weather gods favored me, the plant would grow back. Otherwise, I’d buy another plant and try again the next year.
We’re only a few weeks into spring, and already my sage plants have grown so large they’ve begun to flower. I pruned the bushes, donating the leaves to a friend’s kitchen. Still, if I don’t do something quick they may shade the celery plants which are also vying for sun. <
Sage is a tricky herb – added fresh to a dish, a little (just a tablespoon fresh chopped) goes a long way. But if you fry the leaves and sprinkle with a little salt, they entice you like potato chips.
Here's one of my favorite dishes that requires copious amounts of sage…
Pasta with Fried Sage and Parmesan
1 pound pasta of choice
1 bunch sage, leaves picked
5 cloves garlic, sliced
1/4 cup parmesan
2 – 4 tbs. butter (depending on taste)
1/2 cup chicken broth or cream
salt, pepper and lemon juice to taste
1. Cook pasta according to package instructions.
2. Meanwhile, melt butter over medium high heat in a sauté pan. Add sage leaves. Cook until they begin to look translucent. Add garlic slices. Continue cooking until garlic is lightly browned. Remove from heat
3. When pasta is done, drain. Toss with sage and butter mixture. Add chicken stock and parmesan. Stir to coat pasta. Season to taste with salt, pepper and lemon juice.
Chicken Saltimbocca
4 chicken breast cutlets
1 ball fresh mozzarella, sliced
4 slice proscuitto
1 bunch sage, leaves picked
3 cloves garlic, sliced.
3 tbs. plain oil
1 shallot, diced
1/2 cup sherry
2 tbs. butter (or more to taste)
salt and pepper to taste
1. Heat 2 tablespoons oil in sauté pan. Add sage leaves. Fry for 2 minutes, or until they begin to get crispy. Add garlic, and continue frying for 1 minute or until garlic begins to turn brown. Remove from heat, and season with salt and pepper.
2. Season chicken with salt and pepper. Over the center of each chicken breast, layer mozzarella, prosciutto and 1/8 of sage-garlic mixture. Fold over to seal in filling.
3. Heat large sauté pan over high heat. Add remaining oil. Sauté chicken for 5 minutes on each side, or until golden brown on outside, and cooked through (or you can bake chicken at 350 for 10 minutes).
4. When chicken is finished cooking, keep warm in oven. Add shallots and sherry to chicken pan. Bring wine to a boil over high heat. Remove from heat and swirl in whole butter. Season pan juices to taste with salt, pepper and lemon juice.
5. Slice chicken into medallions, and serve with pan juices. Garnish with remaining fried sage and garlic.
Tales from the Farm – Late April
The Potomac River and Chesapeake Bay converge in Southern Maryland’s St. Mary’s County, and is home to Even’ Star Organic Farm. Brett Grohsgal, a former chef and former boss of yours truly, owns the farm with his wife Christine. In the summer on this fertile 100-acre parcel, they raise 25 varieties of heirloom tomatoes, as well as chilies (including my favorite – peachy-mamas), cucumbers, four varieties of watermelon and okra. They sell their produce at farmer’s markets in DC and Virginia, and to restaurants in the DC metro area. I treasure my visits to the farm because of the nonpareil produce and meats. The cooking is simpler because we cook mainly with farm products and other local produce.
Now that I’ve left Sebastians, I finally have time to visit the farm, and reconnect with (of course, Brett, Chris and Allesandra, but also) where our food comes from. I’ve been visiting the farm for as long as they’ve lived here – over 10 years – but it seems I am always learning and discovering something new.
The farm is “working” three seasons – harvesting the last of the winter crops, coaxing the spring crops and getting the summer crops in the ground. In terms of salable produce, the winter crops trickled down – mostly lettuces and braising green. The spring crops have not yet reached peak – the strawberries are only yielding a pint or two a day. Instead of gleaning the crops for maximum yield, Brett and his crew are working feverishly to get the summer crops in the ground.
Timing the planting of the summer crops is crucial. Last year, the farm experienced the worst drought on record, with less than 1” of rain from April 15 to October 1st. The effects were severe at best, but would have been tolerable if the crops had been in the ground long enough to establish their root systems. This year, Brett’s not taking any chances.
With a soaking rain forecast for Sunday, the mad dash begins to prepare the land. The clover that grew through the winter – 3 feet tall with red flowers — will now be turned into the soil nourishing it with nitrogen and other critical compounds. When the rain stops, the soil will be tilled and is now ready for planting the next day. First crop in: Sweet Potatoes.
The other trick in timing is the temperature. In Southern Maryland, the last frost can be relatively early, in March or April. And every year, Brett experiments with getting a crop of tomatoes in the ground by mid-April so that he can be the first to market with ripe, field tomatoes in June. This week, the temperature may drop to 38F at night, which is cutting it close: the tomatoes seedling were just transplanted 5 days ago – but should still be fine for the tomatoes. A second round of seedlings in the green-house will put Brett at the market at the same time as other farmers… and these are his fail-safe.
End of the Season Cannellonis
With a twinkle of summer on the horizon, I’m less abashed using up my canned tomatoes from last summer.
12 Pasta Sheets cut into 4” squares
3 tablespoon olive oil
2 cups homemade ricotta
¼ cup parmesan cheese
2 tablespoons sliced garlic
1 pound braising greens
1 tablespoon butter
1 tablespoon chopped shallots
¼ cup white wine
2 cups home-canned (preferably smoked) tomatoes
Salt, pepper and lemon juice, to taste
Cream and extra parmesan if desired.
1. Bring a large pot of salted water to a boil. Cook pasta sheets for 3 minutes. Drain, rinse under cold water, and drain well. Toss with 2 tablespoons olive oil. Set aside.
2. Heat a large skillet over high heat. Add remaining 1 tablespoon of olive oil. Add sliced garlic. When the garlic starts to brown, add the green. Cook, stirring often, until the greens have wilted but are still bright green. Remove from pan to cool. Coarsely chop.
3. Make the filling by combining the ricotta, parmesan and braised greens. Season to taste with salt, pepper and lemon juice.
4. In a sauce pot – melt butter over medium heat. Add shallots and cook until translucent, about 4 minutes. Add wine, and cook until evaporated. Add tomatoes and simmer for 10 minutes. Puree. Season to taste with salt, pepper and lemon juice (and a touch of cream if desired).
5. Roll pasta sheets with about 2-3 tablespoons of the filling. Put sauce in the bottom of a 9” x 13” pyrex dish. Place rolled cannellonis top. Drizzle cream and/or parmesan on top if desired
Bake for 30 minutes at 350, or until bubbly delicious looking.
Pasta dough:
1 lb. semolina flour, plus extra for dusting
4-5 large eggs as needed
1 tbs. olive oil
1 tsp. salt
1. Make a well in the flour, and add 4 of the eggs, olive oil and the salt.
2. Beat the eggs with a fork, gradually bringing in the flour from the sides of the well, until the paste has thickened enough so the liquid will not run onto the counter. Switch from a fork to a pastry cutter. Bring all the flour into the already wet part and cut through the dough several times until it is evenly moistened. Start kneading with your hands until the dough forms a ball and looks homogenized, about 8 minutes.
3. If the dough becomes stiff, and refuses to bend, rub in a little of the remaining egg. If the dough becomes too moist, add a bit of the flour.
Work the dough by machine:
4. Divide the dough into 3 balls, and let rest under a damp towel for 20 minutes. Start working the dough through the pasta machine starting with the widest setting. After running it through the machine, fold it into thirds, and run it through again. When the dough is smooth, run the dough through the machine through successively smaller settings. The dough will stretch out, and be rolled very thin.
5. When you have achieved thin sheets, you can let the dough rest for a few minutes before filling or cutting
Ricotta
1 quart whole milk
1 cup heavy cream
4 lemons, juiced
1/2 teaspoon salt
In a non-reactive 2 quart saucepan heat milk and cream to a boil and immediately remove from heat. Add juice and salt, stir well and let sit for 20 minutes. Line a conical sieve with cheesecloth or coffee filters and pour through, allowing the whey to drain out. Let stand at room temperature for 2 hours.